

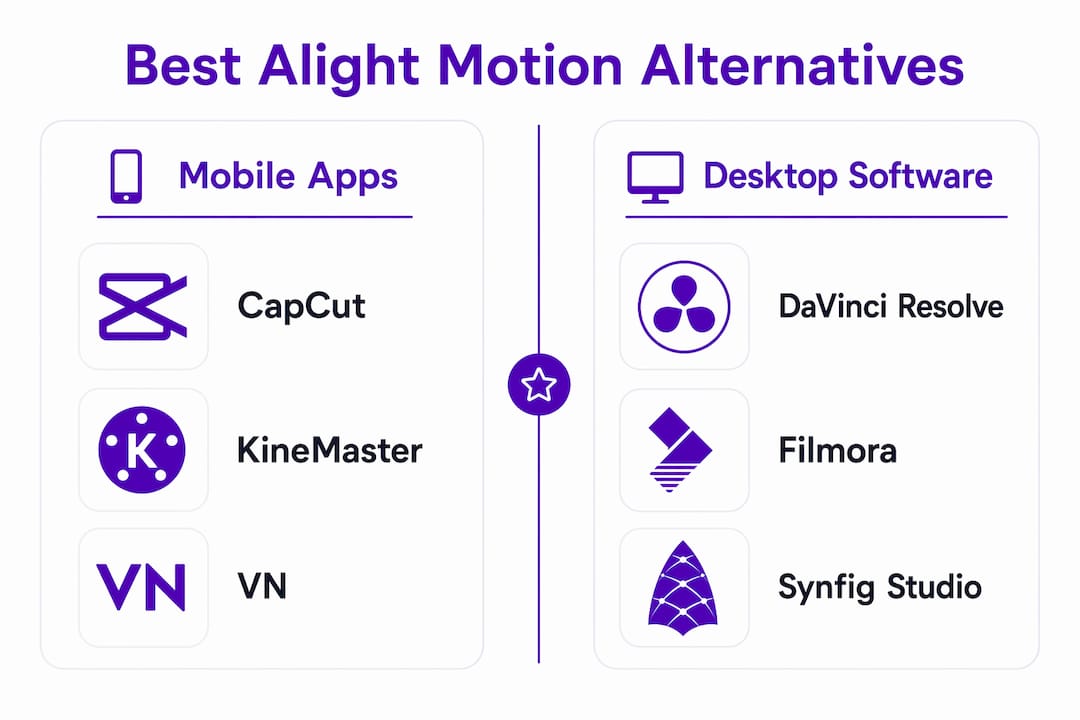
For mobile beginners, CapCut is the fastest on-ramp: massive template library, keyframe animation, and no forced watermark on standard exports. Intermediate mobile creators get more from KineMaster, which adds chroma key, granular layer controls, and a proper keyframe graph. iPad and pro-mobile users should go straight to LumaFusion, the only mobile NLE that genuinely rivals desktop software, with a one-time purchase and no watermark. On desktop, Wondershare Filmora is the smoothest landing for creators moving off mobile, while DaVinci Resolve is the right call once you need professional color grading or node-based compositing. Consider moving to desktop when your project hits four or more 4K layers, requires Bezier curve easing, or demands plugin-level effects.
- CapCut — Free, AI templates, 4K export, occasional branded outros on some templates
- KineMaster — Freemium (watermark on free tier), chroma key, keyframe graph, asset store
- LumaFusion — One-time purchase (~$29.99), pro multi-track NLE, no watermark; iOS/iPadOS/ChromeOS
- Wondershare Filmora — Subscription or one-time, AI tools, cross-platform, beginner-friendly
- DaVinci Resolve — Free and paid tiers, Fusion compositing, professional color, Windows/macOS/Linux
Table of Contents
- What are the best Alight Motion alternatives right now?
- Which mobile apps come closest to Alight Motion’s feature set?
- Desktop alternatives: when should you make the switch?
- How do you choose the right app for your workflow?
- How do you migrate your Alight Motion projects without losing your work?
- Key Takeaways
- What most comparison guides get wrong about picking an editor
- Toolsplorer makes comparing video editors faster
- Useful sources
- FAQ
What are the best Alight Motion alternatives right now?
The table below covers the ten most-compared options across platform, price, and core motion features. Pricing reflects US availability.
| App | Platform(s) | Price | Keyframes / Easing | Layers & Compositing | Max Export | Best For |
|---|---|---|---|---|---|---|
| CapCut | Android, iOS, Web, Windows, macOS | Free (freemium) | Keyframes, speed curves | Multi-track, PiP | 4K 60fps | Social-first beginners |
| KineMaster | Android, iOS | Freemium (watermark on free tier) | Keyframe graph, easing | Multi-layer, chroma key | 4K | Intermediate mobile |
| VN (VlogNow) | Android, iOS, macOS, Windows | Free | Basic keyframes | Multi-track | 4K | Clean exports, no watermark |
| LumaFusion | iOS, iPadOS, ChromeOS, Android (beta) | ~$29.99 one-time | Full keyframes, easing | Multi-track, color | 4K HDR | iPad pro editors |
| Wondershare Filmora | Windows, macOS, iOS, Android | Subscription / one-time | Keyframes, motion effects | Multi-track | 4K | Desktop beginners |
| DaVinci Resolve | Windows, macOS, Linux | Free / Studio paid | Full keyframes, Bezier | Fusion node compositing | 8K | Professional desktop |
| Adobe After Effects | Windows, macOS | Subscription | Full keyframes, graph editor | Layer-based compositing | 8K+ | Pro motion graphics |
| Blender | Windows, macOS, Linux | Free (open source) | Full keyframes, NLA editor | 3D + 2D compositing | Unlimited | 3D/hybrid animation |
| Pikimov | Browser (any OS) | Free | Motion keyframes | Basic compositing | 4K | No-install web editing |
| OpenShot | Windows, macOS, Linux | Free (open source) | Basic keyframes | Basic layers | 4K | Desktop beginners |
Pricing shapes at a glance:
- Free/open source: CapCut (standard exports), VN, Blender, OpenShot, Pikimov, DaVinci Resolve (base version)
- Freemium with watermark: KineMaster (free tier adds watermark; subscription removes it), InShot (Pro removes watermark)
- One-time purchase: LumaFusion (~$29.99), Lightworks (Pro tier)
- Subscription: Adobe After Effects, Wondershare Filmora (subscription option), KineMaster Pro
Pro Tip: Check the watermark policy before you commit to a free tier. CapCut’s standard exports are watermark-free, but some template outros insert a branded element. VN advertises watermark-free exports across its free tier.
Which mobile apps come closest to Alight Motion’s feature set?
CapCut, VN, KineMaster, InShot, and LumaFusion consistently top the comparison lists for mobile creators who want multi-layer timelines and keyframing. Here are the full profiles.

CapCut
The go-to for creators who need results fast. CapCut supports keyframe animation across all settings, chroma key, motion tracking, optical-flow slow motion, and 4K 60fps export. The template library is enormous and updated weekly with trending effects. Standard exports are watermark-free; some template outros include a branded element, so always preview before exporting.
- Keyframes: Yes, all settings
- Easing/graph editor: Speed curves, no full Bezier graph
- Multi-layer: Yes (multi-track timeline)
- Chroma key: Yes
- Vector support: No
- Watermark: No (standard exports); some template outros may add branding
- Pros: Huge template library, AI auto-edit, 4K 60fps, free
- Cons: No Bezier curve editor, some AI features require account sign-in
- Best for: Social-first beginners, trend-driven short-form content
KineMaster
KineMaster’s real edge is the keyframe graph, which lets you control animation timing with precision most mobile apps skip entirely. Add chroma key, an asset store, and granular layer controls, and you get a genuine intermediate-level tool. The free tier adds a watermark; a subscription removes it.
- Keyframes: Yes, with graph editor
- Easing: Yes (keyframe graph)
- Multi-layer: Yes, with blending modes
- Chroma key: Yes
- Vector support: No
- Watermark: Yes on free tier; removed with subscription
- Pros: Keyframe graph, chroma key, asset store
- Cons: Watermark on free tier, subscription required for watermark-free export, heavier on RAM
- Best for: Intermediate creators who need precise animation timing on mobile
VN (VlogNow)
VN keeps things clean: a straightforward timeline, multi-track support, and watermark-free exports at no cost. Keyframe support is present but basic compared to KineMaster. The cross-platform availability (Android, iOS, macOS, Windows) makes it a practical pick for creators who switch between devices.
- Keyframes: Basic
- Easing: Limited
- Multi-layer: Yes
- Chroma key: No
- Vector support: No
- Watermark: None (free)
- Pros: No watermark, cross-platform, clean UI
- Cons: Limited motion-graphics depth
- Best for: Creators who want precise timeline control without a steep learning curve
InShot
InShot is built for speed. Keyframe editing, chroma key, picture-in-picture, and 4K export are all present, but the app shines on vertical formats for Reels and Stories. The Pro subscription removes ads and the watermark and unlocks the full effects library.
- Keyframes: Yes (custom keyframe animations)
- Easing: Basic
- Multi-layer: Yes (PiP)
- Chroma key: Yes
- Vector support: No
- Watermark: Removed with Pro subscription
- Pros: Fast workflow, social export presets, AI background removal
- Cons: Watermark on free tier, limited compositing depth
- Best for: Fast social edits, story and reel formats
LumaFusion
LumaFusion is the only mobile app that genuinely belongs in the same conversation as desktop NLEs. Six video tracks, full keyframe easing, color grading, and a one-time purchase with no watermark. It runs on iOS, iPadOS, ChromeOS, and Android (beta). If you’re on an iPad Pro and hitting the limits of every other mobile app, this is where you go next.
- Keyframes: Full, with easing controls
- Easing: Yes
- Multi-layer: Yes (6 video + 6 audio tracks)
- Chroma key: Yes
- Vector support: No
- Watermark: None
- Pros: Pro-grade timeline, one-time purchase, no watermark, HDR export
- Cons: iOS/iPadOS primary; Android support still in beta
- Best for: iPad Pro users and pro mobile editors
Motion Ninja and Motion Ninja Video Editor
Motion Ninja focuses on dynamic transitions and stylized motion effects. It’s a solid pick for effect-heavy short-form content where the visual punch matters more than frame-accurate easing. The Motion Ninja Video Editor variant shares the same core but packages it with additional preset packs.
- Best for: Stylized, effect-heavy short-form content
- Pros: Eye-catching transitions, motion-centric effects
- Cons: Limited compositing depth, fewer manual controls
Cute CUT
A touch-first editor with drawing tools and basic layer controls. Cute CUT suits casual animators who want to sketch and animate on a phone without a steep learning curve. Don’t expect Bezier curves or chroma key.
- Best for: Casual animators, simple timeline drawing
- Pros: Touch-optimized, drawing layer support
- Cons: Limited export control, no advanced motion features
Video Star
Video Star is built around music-video editing: its effects library is tuned for choreography and beat-synced cuts. Keyframe controls exist but are secondary to the effects-first workflow.
- Best for: Music video and choreography short-form content
- Pros: Music-first effects library, strong for stylized edits
- Cons: Steep learning curve for non-music-video use cases
Vinkle Music Video Maker Magic Effects
Vinkle leans entirely on prebuilt music-synced templates. If you need a trend-driven video in minutes, it delivers. If you want manual control over keyframes or layers, look elsewhere.
- Best for: Template-based, trend-driven short videos
- Pros: Prebuilt music-synced templates, fast output
- Cons: Minimal manual control
PicsArt, Meitu, and Efiko: Aesthetic Filters
These three sit at the photo-editing end of the spectrum. PicsArt has video features and a large sticker and asset library; Meitu specializes in aesthetic filters and stylized looks; Efiko focuses on aesthetic filter presets. None of them replaces a timeline editor, but they’re useful for creators who mix image motion effects with short clips.
GoPro Quik, VMake, Hailuo AI, Time Cut: Smooth Slow Motion, AirVid, Stop Motion Studio, PixaMotion, and XML for Alight Motion (XAMO)
- GoPro Quik: Auto-edit tool optimized for action footage; minimal manual control but excellent for GoPro users who want fast, polished exports.
- VMake: AI-powered video creation focused on quick marketing clips from images and text prompts.
- Hailuo AI: AI video generation tool; generates short clips from text or image inputs rather than editing existing footage.
- Time Cut: Smooth Slow Motion: Specialized in smooth slow-motion and speed-ramp effects; narrow use case but excellent at it.
- AirVid: Lightweight mobile editor focused on quick cuts and basic effects.
- Stop Motion Studio: Purpose-built for stop-motion animation; frame-by-frame capture with onion-skinning support.
- PixaMotion: Animates still photos with motion effects; not a full video editor but useful for photo-based motion content.
- XML for Alight Motion (XAMO): A utility app for importing and managing XML preset files within Alight Motion workflows; not a standalone editor but a workflow tool for Alight Motion users who want to apply community-shared presets.
Desktop alternatives: when should you make the switch?

There is no official Alight Motion desktop version. Guides consistently recommend native desktop editors over emulators for any serious production work. Here’s when to move and what to move to.
When to switch to desktop:
- Your project uses four or more 4K layers and your phone is throttling or overheating
- You need Bezier curve easing or a full keyframe graph editor
- You’re exporting for broadcast, client delivery, or platforms that require specific codec/format control
- You need plugins, LUTs, or third-party effects that mobile apps don’t support
- Collaboration requires shared project files or interchange formats (XML, AAF, EDL)
Wondershare Filmora
Filmora is the most direct landing pad for creators moving from mobile. Multi-track editing, AI tools, and cross-platform project continuity make the transition feel incremental rather than jarring. Available on Windows, macOS, iOS, and Android. Pricing is subscription-based or a one-time purchase option.
- Pros: Beginner-friendly UI, AI effects, cross-platform, strong template library
- Cons: Some advanced features locked behind higher-tier plans
- File interchange: Basic XML project export; no AAF/EDL
- Best for: Mobile creators making their first desktop move
DaVinci Resolve
The free version of DaVinci Resolve is more capable than most paid desktop editors. Fusion handles node-based VFX and motion graphics; the color page is industry-standard. The learning curve is real, but the payoff is a tool used in professional film and TV post-production. Studio (paid) unlocks noise reduction, certain AI features, and collaboration tools.
- Pros: Free base version, Fusion compositing, professional color, 8K support
- Cons: Steep learning curve, GPU-hungry
- File interchange: XML, AAF, EDL import/export
- Best for: Cinematic and professional motion/VFX workflows
Adobe After Effects
After Effects is the industry standard for motion graphics and compositing. The plugin ecosystem (including Motion Bro, AEJuice, and Video Copilot) extends it far beyond what any mobile app can reach. It requires a Creative Cloud subscription, which makes it the most expensive option on this list.
- Pros: Plugin ecosystem, precise motion control, industry-standard
- Cons: Subscription only, high hardware requirements, steep learning curve
- File interchange: XML, AAF; integrates with Premiere Pro via Dynamic Link
- Best for: Professional motion designers and VFX artists
Blender
Blender is free, open-source, and handles 3D modeling, rigging, animation, and compositing in one application. The 2D animation workspace (Grease Pencil) is genuinely powerful for hybrid 2D/3D motion projects. The learning curve is steep, but no other free tool comes close to its depth.
- Pros: Free, 3D + 2D compositing, active community, no watermark
- Cons: Steep learning curve, not optimized for quick social edits
- File interchange: Alembic, FBX, SVG; no native NLE XML
- Best for: 3D and hybrid 2D/3D motion projects on a budget
Synfig Studio and Glaxnimate
Synfig Studio is the open-source answer for 2D character animation: vector tweening and bone rigging without a subscription. Glaxnimate is lighter, focused on vector animation with Lottie export support, making it the right pick for web animation and motion exports that need to run in browsers or apps.
| Tool | Platform | Price | Key Feature | Export |
|---|---|---|---|---|
| Synfig Studio | Windows, macOS, Linux | Free | Vector tweening, bone rigging | SVG, GIF, video |
| Glaxnimate | Windows, macOS, Linux | Free | Lottie export | Lottie, SVG, video |
Lightworks and Cavalry
Lightworks is a professional long-form editor with a free tier that covers most editing needs. Its motion-title tools and effects are solid for narrative projects. Cavalry is a different animal: a procedural motion-design tool with strong text animation and data-driven features, aimed at motion designers who want to work programmatically rather than manually.
- Lightworks: Best for long-form narrative editing with motion titles; free tier available, Pro is a one-time purchase
- Cavalry: Best for procedural motion design; subscription-based; Windows and macOS
VSDC Video Editor
VSDC is Windows-only and runs well on low to mid-tier hardware. Motion effects, masking, and basic compositing are all present. It’s not glamorous, but it’s free and doesn’t demand a powerful GPU.
- Best for: Windows users on budget hardware who need decent motion tools
- Pros: Lightweight, free, motion effects and masking
- Cons: Windows only, dated UI
InVideo and Pikimov
InVideo is browser-based and template-driven, aimed at marketing teams who need quick video assets without installing software. Pikimov is also browser-based but more motion-design focused: it edits locally in the browser, supports 4K export, and requires no server upload or signup. Both are solid no-install options.
- InVideo: Best for templated marketing video production
- Pikimov: Best for motion-design work in the browser with no data upload
Unity, Autodesk, Doodly, Muvizu, and Creo
These sit at the specialized or high-end edge of the spectrum. Unity handles real-time rendering and interactive animation. Autodesk’s suite (Maya, 3ds Max) covers high-end 3D and VFX pipelines used in professional studios. Doodly is a whiteboard animation tool for explainer content. Muvizu enables quick 3D scene-based storytelling with prebuilt characters. Creo covers design-to-motion prototyping for UI and product animation workflows.
How do you choose the right app for your workflow?
Matching the tool to your actual situation prevents the most common mistake: picking the most feature-rich app and spending three weeks learning UI instead of making videos.
- Identify your primary device. Mobile-only creators should stay on mobile until a project genuinely demands desktop power. iPad Pro users can go straight to LumaFusion.
- Define your project complexity. Social shorts with cuts and filters? CapCut or InShot. Multi-layer motion graphics with precise easing? KineMaster or LumaFusion on mobile; DaVinci Resolve or After Effects on desktop.
- Check export requirements. If a client or platform requires a specific codec, resolution, or color space, verify the app supports it before you start.
- Decide on templates vs. manual control. Template-first apps (CapCut, Vinkle, InVideo) speed up production but limit creative control. Timeline and keyframe apps (KineMaster, LumaFusion, DaVinci Resolve) require more time but produce more original work.
- Set a real budget. Free tiers often add watermarks. Factor in whether a one-time purchase (LumaFusion, Lightworks Pro) or a subscription (After Effects, KineMaster Pro) fits your output volume.
- Test collaboration needs. If you share projects with a team, check whether the app supports project file export, XML/EDL interchange, or cloud sync.
Red flags to watch for:
- Watermarks that appear only on export (not visible during editing)
- Subscription paywalls that lock basic export resolutions
- Apps that crash on projects with more than three 4K layers on mid-range devices
- No project portability (proprietary formats with no export path)
Questions to ask when testing any app:
- Does a test export at max resolution complete without crashing?
- Can you export a transparent background (alpha channel) for compositing?
- Does the keyframe editor show a curve/graph, or only linear interpolation?
- How does the app behave on your device after 20 minutes of editing?
Skill-level mapping: beginners should start with template-first apps, intermediate creators should move to timeline and keyframe tools, and advanced creators should move to desktop NLEs or node-based compositors. This creator growth-stage approach is the most consistent recommendation across major comparison guides.
How do you migrate your Alight Motion projects without losing your work?
Direct project import from Alight Motion into another app is rarely possible. The practical path is to export assets and reconstruct the timeline.
Step-by-step migration:
- Export transparent renders from Alight Motion as PNG sequences or video with alpha channel where the app supports it. This preserves composited elements without locking you into Alight Motion’s project format.
- Export SVG or vector assets for any vector-based elements you want to reuse in Synfig, Glaxnimate, or After Effects.
- Document your keyframe timing. Screenshot or note the keyframe positions and easing types before you close the project. Recreate them in the new app using reference frame markers.
- Rebuild the timeline in order of complexity. Start with the base video track, add audio, then layer effects and motion elements on top.
- Use XML or EDL interchange where supported. DaVinci Resolve and After Effects both accept XML for basic timeline reconstruction. This won’t carry over Alight Motion-specific effects, but it preserves cut points and clip order.
Do export from Alight Motion:
- PNG sequences with transparency
- Flat video renders of completed composites
- Individual audio tracks
- SVG/vector elements
Don’t try to:
- Import Alight Motion project files directly into another app (no cross-app format support exists)
- Rely on screen recording as a substitute for a proper export (quality loss is significant)
Pro Tip: Master the keyframe graph in whatever mobile editor you use before switching to desktop. The concepts of easing, hold keyframes, and Bezier handles transfer directly to After Effects, DaVinci Resolve, and Blender. Learning the concept once means you only need to find the equivalent control in the new UI, not relearn the underlying logic.
Bezier curve editing for keyframes is the single feature most often missing in mobile editors and the most common frustration for animators switching apps. Before committing to any mobile editor for a complex project, verify it has a curve/graph editor, not just linear keyframe interpolation.
On the hardware side, projects with multiple 4K layers can push mobile devices into thermal throttling. Use proxy clips (lower-resolution stand-ins) during editing and switch to full resolution only for the final export. If your phone is consistently overheating or dropping frames during playback, that’s the clearest signal to move the final render to a desktop machine. Avoid Android emulators for production work; native desktop software delivers consistent rendering and access to the full plugin ecosystem.
Key Takeaways
The strongest Alight Motion alternative depends on your platform and project complexity: CapCut leads for mobile beginners, LumaFusion for pro mobile, and DaVinci Resolve for professional desktop work.
| Point | Details |
|---|---|
| Mobile beginners | CapCut offers keyframes, 4K export, and no watermark on standard exports for free. |
| Intermediate mobile | KineMaster adds a keyframe graph and chroma key; watermark is present on free tier and removed with subscription. |
| Pro mobile / iPad | LumaFusion is a one-time purchase with a true multi-track NLE and no watermark. |
| Desktop move | Switch when projects hit four or more 4K layers, need Bezier easing, or require plugin support. |
| Toolsplorer | Use Toolsplorer’s video tool comparisons to check current pricing, feature scores, and side-by-side reviews before committing to any app. |
What most comparison guides get wrong about picking an editor
The standard advice is to pick the app with the most features. That framing misses the actual problem: feature count doesn’t predict whether a tool fits your device, your skill level, or your output cadence.
The more useful lens is workflow fit. A creator making three Reels a week on an Android phone has completely different constraints than someone producing a 90-second motion-graphics piece for a client. CapCut solves the first problem faster than any other app. It doesn’t solve the second one at all. Recommending DaVinci Resolve to a beginner who just wants to add text effects to a 30-second clip is the kind of advice that sends people back to Alight Motion.
The other thing guides consistently underweight is the watermark question. A watermark isn’t just an aesthetic problem. For anyone publishing professionally, a visible app logo on an export is a credibility issue. Always test the export before you build a project in a new app. The free tier of KineMaster adds a watermark; the free tier of VN does not. That single difference changes the recommendation entirely for a creator who can’t or won’t pay a subscription.
The migration advice in most guides is also too optimistic. “Just import your project” is not a real option between most apps. The practical path is to export transparent renders and rebuild, which takes time. Budget for it.
Toolsplorer makes comparing video editors faster
Sorting through 30-plus video editors across mobile and desktop is exactly the kind of decision where having aggregated, scored data saves real time. Toolsplorer pulls together user reviews, feature checklists, and current pricing across the full video tools category so you can run a side-by-side comparison without visiting a dozen separate app store pages.
The AI-driven scoring system weights reviews from multiple sources, which means the scores reflect actual user experience rather than marketing copy. If you’re deciding between LumaFusion and KineMaster Pro, or trying to figure out whether Filmora’s subscription is worth it for your output volume, the Toolsplorer comparison hub gives you the data to make that call in minutes. Head there, filter by platform and price model, and you’ll have a shortlist built around your actual workflow.
Useful sources
- CapCut on Google Play — verify current features, watermark policy, and export specs
- VN (VlogNow) on Google Play — confirm watermark-free export policy and platform availability
- KineMaster official site — check subscription pricing, keyframe graph details, and asset store
- Pikimov — verify browser-local editing, 4K support, and no-signup policy
- Wondershare Filmora: Alight Motion for PC alternatives — desktop alternative recommendations and emulator warnings
- Filmora: Alight Motion app review — Filmora’s AI tools and cross-platform workflow details
- Top 5 alternatives to Alight Motion (Android & iOS) — feature and watermark comparisons for mobile alternatives
- Alternatives of Alight Motion: a complete guide — creator growth-stage framework for choosing alternatives
Before downloading: always check regional availability in your local app store. Pricing and feature sets can vary between the US App Store, Google Play, and direct desktop downloads.
FAQ
What app is the closest to Alight Motion for mobile?
KineMaster is the closest feature match for intermediate mobile creators: it offers a keyframe graph, chroma key, multi-layer compositing, and blending modes. CapCut is the better pick for beginners who prioritize speed and templates over manual control.
Is VN or Alight Motion better for watermark-free editing?
VN advertises watermark-free exports on its free tier, which gives it a clear practical edge over Alight Motion’s subscription-gated watermark removal. For motion-graphics depth, Alight Motion still leads; for clean free exports, VN wins.
Is Video Star better than Alight Motion for music videos?
Video Star’s effects library is specifically tuned for music-video and choreography edits, which makes it stronger for that narrow use case. Alight Motion offers more general-purpose motion-graphics control, including vector support and more precise keyframe tools.
Which is better for a desktop workflow: Filmora or DaVinci Resolve?
Filmora is easier to learn and better for creators making the transition from mobile. DaVinci Resolve is more powerful, with professional color grading and Fusion node compositing, but it demands more from your hardware and more time to learn. Start with Filmora if you’re new to desktop editing; move to DaVinci Resolve when you need professional-grade output.
What is the best free Alight Motion alternative with no watermark?
CapCut (standard exports), VN, Blender, OpenShot, and Pikimov all offer watermark-free output at no cost. For mobile, CapCut and VN are the most practical; for desktop, Blender and DaVinci Resolve’s free tier cover professional-level work without a watermark.